| Step 3: Final Assembly and Testing ... | |
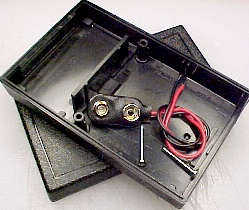 |
Now we turn our attention to
the case. The case that I normally use for the Simple
Bat Detector is a PacTec HM-9VB. The case is
furnished with two fastening screws and a 9 volt battery
clip, which are in their own small packet. Set aside the top part of the case, and the two screws. For the next few steps we will only be using the bottom of the case ( the part with the battery door ) and the battery clip wire. |
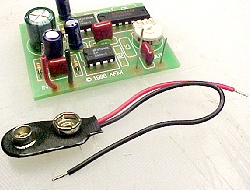 |
Cut the red lead of the battery
clip to about 2" ( 5 cm ), and the black lead to 4"
( 10 cm ). Strip the ends of the wire, and tin with
solder From the two pieces of battery lead that were just clipped off, fashion two short wires, one black, one red, to about 1" ( 2.5 cm ) and solder them to the circuit board at the input pads. The black wire should go to the inside, and the red to the outside ( see picture ). These leads will be attached to the transducer on the front panel. |
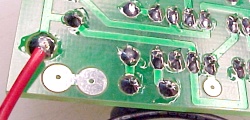 |
On the solder side of the circuit board, find the
double pad near C4. Next to the double pad is an unused
pad that is the +9 volt connection for the bat detector
circuit. Solder the red lead from the battery clip to the circuit board as shown. The black lead from the battery clip is still unconnected. |
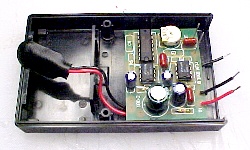 |
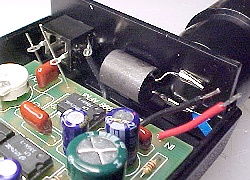
Loosely fit the circuit board in the bottom half of
the case so the wires are at the front of the case (
where the panel will go ). The black lead from the
battery clip will go under the circuit board and come out
near the middle of the case front. Be sure that the stiff output wires ( fashioned from capacitor leads earlier ) are straight up. Then fold the insulated wires back toward the middle of the board and grab the front panel assembly. |
 |
Carefully slide the back two terminals of the
earphone jack, on the front panel, down over the stiff
wire leads on the circuit board. Settle the front panel
into its groove on the front of the case, and gently
adjust the position of the stiff wires and circuit board
so that it sets comfortably in the case. Using needle
nosed pliers, route the black battery lead that is coming
under the circuit board to the earphone jack terminal
that is closest to the panel. Solder the connections to the earphone jack terminals, and clip off any excess wire leads. |
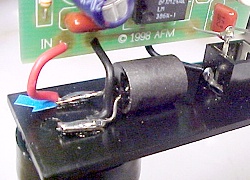 |
Remove the front panel and circuit board, and set
them up so that you can solder the remaining two wires to
the transducer. The red wire from the circuit board goes
to the hot
lead, which was marked in the first step. The black wire
goes to the remaining ground
lead. When these last wires have been connected, it is time to test the detector !!! Replace the circuit board in the lower case. Attach a 9 volt battery to the battery clip, and place it in the battery section of the case. |
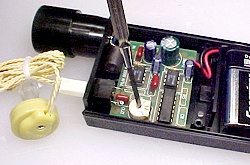 |
Assemble and plug in the earphone. Using a small
screwdriver, or an alignment tool, set the volume control
full counter-clockwise. Put the earphone in your ear, and aim the detector at an ultrasound noise source - like hard running tap water. Slowly adjust the control pot clockwise until the volume level is comfortable. Aiming the detector away from the noise source should cause the detector to go silent. |
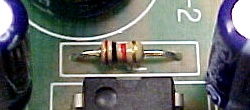 |
If the detector seems too sensitive, or makes continuous noise or static, the gain of the second stage amplifier may be too high. To reduce the gain, remove the 1K ( brown-black-red ) resistor that was installed earlier at R2, and replace it with a higher value, and re-test the detector. |
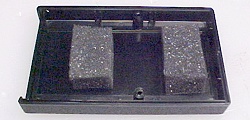 |
I like to use a couple of pieces of self adhesive
sponge weatherstrip attached in the top of the case to
hold the circuit board down, and keep the battery snug in
its compartment. Alternatively, you could use hot melt glue to cement the circuit board into the bottom of the case ... but don't do that until you've set the gain resistor the way you want !!! |
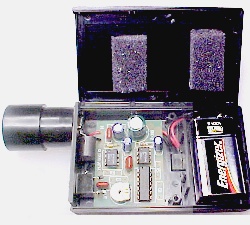 |
So there it is. with an hour or two of careful work,
you have constructed your very own Simple Bat
Detector. All that remains is to close up the cover and screw in the two fixing screws that came with the case ... you know ... the ones that were in the package with the battery clip ... you do know where you put them ... A single alkaline type battery will likely last you all summer, as the detector uses very little power. Remember, plugging in the earphone turns the power on ... removing the earphone turns it off. |
 |
The End !! |